Westfield Direct
Summary
Westfield Direct is Australia’s most trusted online marketplace, giving our customers the best products from their favourite retailers, all in one place.
Customer Onboarding Process
Creating merchants
Definition of a merchant
A merchant is CrescoData’s definition of a single store or vendor/retailer/merchant. The key characteristics of a merchant will be that a merchant is the owner of all the data within it.
Although a merchant may have multiple sources of data, it is recommended for the merchant to split its sources into different ‘merchants’ on CrescoData to maintain the cleanliness of the data.
Steps to creating a merchant
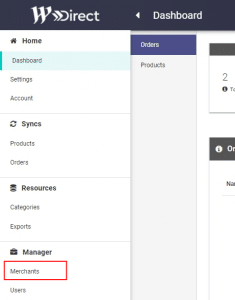
- Click on “Merchants” on the left-hand panel:
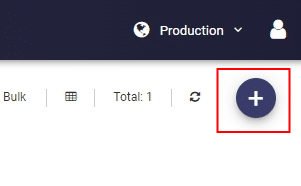
- Click on the “+” button on the top right corner of the “Merchants” screen:
- Fill in the “Name” and “Country” fields on the next page
- Click on “Create” on the right side of the page:

- Done! A merchant is created
Creating users
Definition of a user
A user is an account on CrescoData portal. There are different levels of access for a user. Most commonly, there are 2 types of users in the CrescoData portal.
- Merchant
- Agency
Merchant
A merchant level user will be assigned to a CrescoData merchant, and it will only have access to the data of that particular merchant. This is meant for users of the merchants.
Agency
An agency user will be assigned to the company and will have access to all the merchants’ data within the same company. An agency user will also have the ability to add other merchant level users. This is meant for users of the customers to help with operations.
Steps to adding a user
- Click on “Users” on the left-hand panel:

- Click on the “+” button on the top right corner of the “Users” screen:
- Fill in the “Email”, “Full Name” fields on the Users page and select the appropriate role.
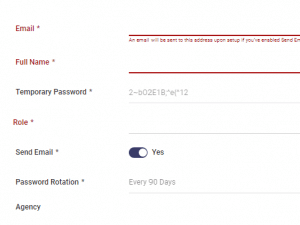
-
- If the user should only have access to a single merchant, select the “Merchant” role, and assign the designated merchant to the user.
- Else select “Agency” if the user should have access to all the merchants integrations
- Click on “Save” on the top-right corner of the screen
- Done! The user is created, and an email containing the login details will be sent to the Email address given.
Merchant Onboarding Process
Credentials
CrescoData will require the API credentials for each of the source/destination channels to be able to integrate to both and sync the product and order payloads between the channels. This is mandatory. Else, crescodata will not have API access to the source data, and we will not be able to set up the integration properly.
You will find the Credential details field by clicking on “Settings” on the left-hand panel of the portal. Here are the steps to get and input your credentials for the different channels.
Westfield
Westfield uses an oAuth link to authenticate the user and the store. Thus, you simply have to click on the link and login using your store credentials to give CrescoData access to your Westfield store.
Shopify
Here are the steps to obtain the necessary credentials from a shopify store:
- Login to your shopify store
- Click on “Apps” on the left-hand panel
- Click on “Develop apps for your store” at the bottom of the page :

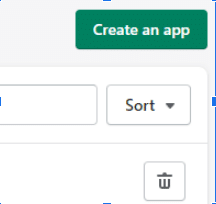
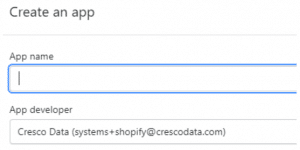
- Click on “Create an app” at the top of the page :
- Under “App name”, give a name for this app. You may name this CrescoData for future reference. The App developer should be self populated with your one of your store’s contact email addresses :
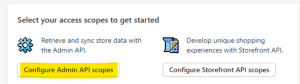
- Click on “Configure Admin API scopes” in the next page :
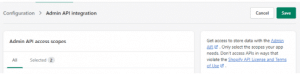
- Give “Read and write” access for the following scopes:
- `Assigned fulfillment orders`
- `Inventory`
- `Orders`
- `Products`
- Once done, click on the “Save” button that appears at the top of the page :
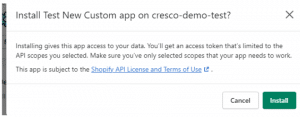
- A “Install app” button will appear above the previous “Save” button once it has been clicked. Click on it :

- A pop up will appear, click on the “Install” button :
- Once installed this will take you to a page to Reveal token once - Please copy this token to be used in the portal.
- Authentication details will then be provided to load into the Shopify section of the Portal.
- URL - Your myshopify.com url. i.e. https://westfield.myshopify.com
- Admin API Access Token - Token saved above.
- Shared Secret / API Secret Key - API secret key from the custom app screen where the token was saved.
- You may ignore the rest as they are for the deprecated version of Shopify’s “Custom apps”
Bigcommerce
Here are the steps to obtain the necessary credentials from a Bigcommerce store:
- Login to your Bigcommerce store as the owner user
- Click on “Advanced Settings” on the left-hand panel
- Then click on API accounts
- If an error appears, it indicates that you’re not logged in as the owner of the BC store, and you’ll have to login as that user
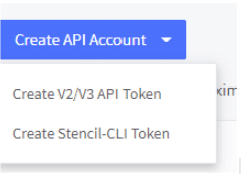
- Click on “Create API account” and “Create V2/V3 API Token” :
- Give a name for this API account. You may name it “CrescoData” for easier future references.
- Give “modify” or “read-only” access to all listed endpoints. If you’re uncomfortable with giving access to certain endpoints, please feel free to reach out to CrescoData’s support team to check on if it’s required
- Scroll down and click on the “Save” button at the bottom of the page
- Bigcommerce will automatically download the credentials to your computer in a txt file
- You can use the txt file to fill in the Credential details on CrescoData portal
- Client Id = Bigcommerce’s “Client Id”
- Access Token = Bigcommerce’s “Access Token”
- Store Hash = A part of Bigcommerce’s API Path. It is the value between “stores/” and “v3”
- E.g https://api.bigcommerce.com/stores/xly7qrdo3u/v3/
- The highlighted portion is the Store Hash value.
Woocommerce
Here are the steps to obtain the necessary credentials from a wooCommerce store:
- Login to your wooCommerce store
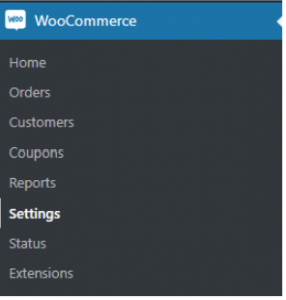
- Click on “wooCommerce -> settings” from the left-hand panel :
- Select “Advanced -> REST API” from the Settings page :

- Click on “Add Key”
- Name the key as anything under the “Description field”, Select the appropriate “User”, and select “Read/Write” for the “Permissions” field.
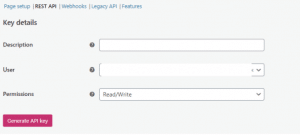
- Once done, simply click on “Generate API key”
- Record the “Consumer Key” and “Consumer secret” to be input in the credentials settings page within Cresco’s Portal.
How it works
Once you have added in the credentials for both [source] and [destination], click on “Next” to go through the “Products Sync Settings” and the Orders Sync Settings page and activate all the channels within it before clicking “Save” at the end to activate the integration. There are screenshots of the different settings you may input for the different syncs and channels below.
Once this is done, the integration is live, and your source channel is now connected to [destination]. However, please follow the steps below on “Custom settings”, “Category mappings” and “Attributes mappings” to make sure you’ve completed the rest of the onboarding steps so that your products and orders are integrated properly with the [destination] with minimal errors.
Shopify
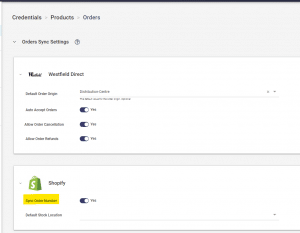
On the orders page, you may select the “Sync Order Number” option to sync the [source] order number to Shopify, instead of using Shopify’s standard order number.
Woocommerce
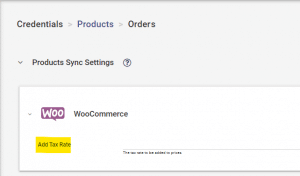
We have a standard “Tax Rate” setting for wooCommerce to allow the merchant to increase or decrease the price taken from the wooCommerce source and to be sent to the destination. The value input is in % based.
Bigcommerce
For Bigcommerce, we have an “Image Attribute” and “Keyword Excludes” standard settings available for the product sync.
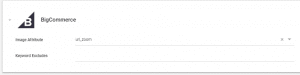
Image Attribute - This settings tells CrescoData which version of the Bigcommerce Image we’ll be pulling as the main image for a product.
Keyword Excludes - CrescoData will exclude any products containing the values here within their “Search Keywords” Bigcommerce attributes from publishing to the destination channel. You may add multiple values here by comma separating them.
Custom settings
Westfield - Credential settings
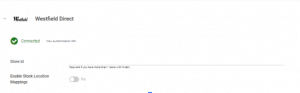
Store Id - If you have multiple westfield stores linked to the westfield account that you’ve used to authenticate with the oAuth link. CrescoData will require you to state the exact storeId that you wish to connect to specifically. Else, CrescoData will be connecting to the default Westfield store.
Enable Stock Location Mappings - This setting can be turned on if your source data contains inventory stored in multiple locations, and you would like to map each of them to a specific Westfield origin location.
Westfield - Product settings
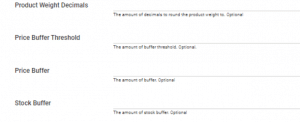
Product Weight Decimals - You may use this to set the number of decimals to round the product weight to
Price Buffer Threshold - Determines the highest price at which the “Price buffer” is no longer applied. I.e if this is set at $35, the “Price Buffer” amount will only be added to product below $35.
Price Buffer - The amount to adjust your source data products prices by.
Stock Buffer - The amount to adjust your source data products stock/inventory by.
Westfield - Orders settings
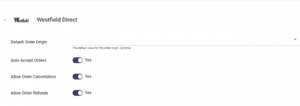
Default Order Origin - You may set this to a Westfield location if you wish to default the order origin to a certain Westfield location. Note: It has to be the same exact value as Westfield’s location name.
Auto Accept Orders - Allows CrescoData to autoaccept the orders from Westfield. Note: This should be turned ON by default, else there may be errors in sending the orders to your source.
Allow Order Cancellation - Allows CrescoData to cancel orders on Westfield. Note: This should be turned ON by default if you wish to enable the order cancellation flow.
Allow Order Refunds - Allows CrescoData to cancel orders on Westfield. Note: This should be turned ON by default if you wish to enable the refunds flow.
Category mappings
It is usually mandatory to map your source data products to a category listed on [destination]. This is done through a manual process of either mapping the source products categories to a category within the [destination] category list.
If you’re a Shopify/Woocommerce merchant, you may use the custom category tags to map your products to a specific category on [destination], and the steps for that are listed above.
However, if you wish to rely on your source channel’s categorization to map to the [ destination] categories, you may follow the steps below.
We’re relying on the following source’s attributes to categorise your source products on CrescoData portal:
- Shopify: Product Types
- Woocommerce: Categories
- Bigcommerce: Categories
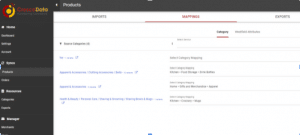
To do this, click on “Products” on the left-hand panel, then select the “MAPPINGS” column from the top panel
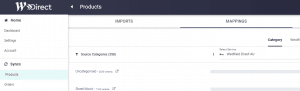
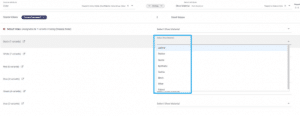
You’ll see the values of these attributes under the “Source Categories” column within the Categories mapping page. And on the right of it will be the list of [destination] categories that you can map each of the source categories to.
Simply click on the “Select Category Mapping” field for each of the source category and a drop down of the [destination] category will appear for you to select and to map to :
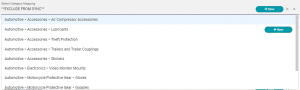
You may also copy a mapped value to be pasted for other source categories by clicking on the middle button on the right-hand side of the field after you’ve selected a category mapping for one of the source categories.
![]()
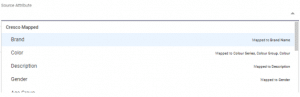
Attributes mappings
CrescoData’s integration already maps the common product attributes from your source data to the destination’s channel product attributes. This means you do not have to manually map basic product attributes such as title, description, price and etc. If you would like to find out about the exact product attributes, you may reach out to the CrescoData support team to pass you the list for your integration.
The attributes mapping page is used to map other non-core [source] attributes to specific [destination] attributes which may not be mapped generically.
This may include category-specific-attributes and/or custom attributes within the [destination].
Note: Ideally, this should not overwrite any of the pre-mapped attributes that is already done by CrescoData on the backend, as it may cause product listing issues on the destinations. This should only be used for additional attributes that aren’t covered by it.
It works the same way as Category mappings. However, the key difference is that you’ll potentially find 2 list of source attributes that can be used to map to a destination attribute
- Cresco Mapped - These are common attributes that have been mapped to our CrescoAttributes and will most likely already been mapped to the destination.
- Source Attributes - These are the variable source attributes that can be found within the source product data. These usually include :
Mapping to text field attributes
If the destination attribute you’re mapping to is a free-text field attribute, you may edit the destination value that you would like to map the source value to. You can do this by clicking on the edit button next to the destination value.
Mapping to dropdown-list attributes
If the destination attribute you’re mapping to is a drop-down field, you may simply select the available values that you would like to map each source attribute to.
Errors and notifications
Checking on errors
Once the initial settings have been set up, you will need to review the responses of the integration to make sure that all products and orders are flowing through the integration smoothly.
The CrescoData portal allows you to view all the aggregated responses from either the Product sync or Order sync. You may do this by following these steps below:
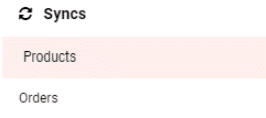
- Select either Products or Orders from the left-hand panel. This will show you either all of the products data or the orders data:
- Click on “Diagnostics” on the top panel
- And the list of aggregated responses will be shown:
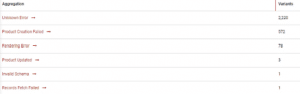
- You may then click into each of aggregated responses to view the detailed responses and troubleshoot them (if you’re able to figure out the error, else you may reach out to our support team at support@crescodata.com who will be able to assist you asap)
Setting up an error notification system
There should not be any errors once things have been set up properly and we’ve eliminated the initial phase of errors. However, CrescoData also allows you to set up a notification system for any integration errors so that you’re always in the loop of the integration status.
You can set this up by following the steps below:
- Select either Products or Orders from the left-hand panel. This will show you either all of the products data or the orders data.
- Select “Diagnostics” from the top panel
- And instead of clicking on each of the aggregated responses, click on the “Sync Results” button that is just below the top panel :

- The page will now show all the responses for the selected sync instead of the aggregated responses
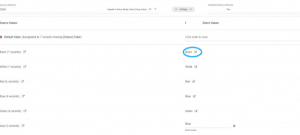
- You may then use the “Filter” function to filter out the responses you would like to be notified on. This can be found on the left side of the page, and right above each of the data.
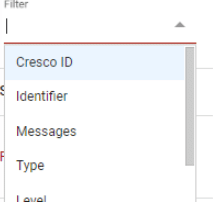
- To filter for errors, select “Level” from the filter list, and select “Error” within the “Search Level” field
![]()
- Once you’ve filtered out the type of errors and or data you would like to be notified on, click on the “Export” button on the right side of the page
![]()
- A separate page will pop up, and you can set up the details of the notification on this page
- Select “Scheduled” button to be “Yes”
![]()
-
- Give a name for the export file that is to be sent to your email. You can name it to your liking.
![]()
-
- You may also select the fields you would like to include in the notification. There’s no need to edit it as we’ve already included the common attributes that will help you identify the data that is facing the error. However, you may choose to select more.
- Add the emails that you would like to receive the notifications. Note: you must click on “enter” after each email, and each email should be highlighted, else, it has not been entered.
-
- Email subject - Add in the email subject that you would the email to be
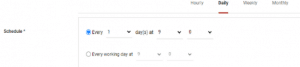
- Schedule settings - This determines the frequency of the notification. There are settings within it for you to edit according to your preference.
- E.g A daily frequency
-
- Rolling Field - Lastly, select the rolling field that CrescoDate will use to filter new data for the notication. It is highly recommended to select “updatedAt” for this so that CrescoData will only send new responses that have been created in the past sync.
![]()
Other support
If there are any other issues or problems, please feel free to reach out to CrescoData’s support team at support@crescodata.com. Our friendly support team will do their best to help to resolve the issues as soon as possible.