Navigation

Left-hand panel
-
Home
-
My Dashboard
-
Shows the homepage dashboard containing stats on the number of orders and products across all the merchants within this account
-
-
My Reports
-
Shows you the number of Services, Merchants and GMV (If applicable) for all merchants within this account.
-
-
-
Syncs
-
Syncs determine the type of data we’re pulling and sending between a source and a destination. For E.g. An order means it is the sync where CrescoData is sending order data between a source and a destination.
-
Product Sync
-
Shows CrescoData’s product page. It will show all product data across all Merchants by default if you have manager access.
-
-
Order Sync
-
Shows CrescoData’s order page. It will show all order data across all Merchants by default if you have manager access.
-
-
-
Customers
-
Customers
-
Merchants
-
Shows all the merchants that a Manager account may have access to.
-
-
Product page
Listing page
-
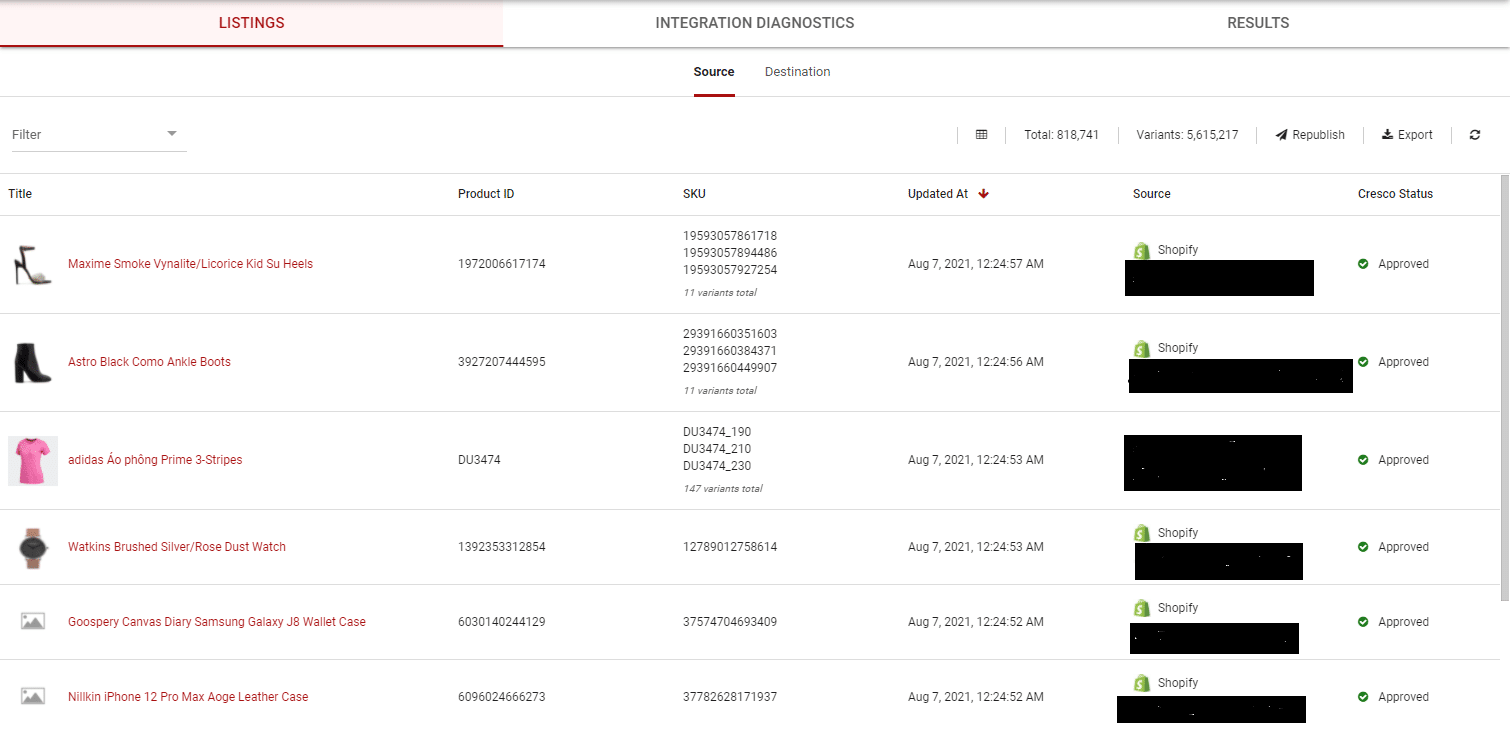
The listing page shows the overview details of all the products being synced from the source to the destination
-
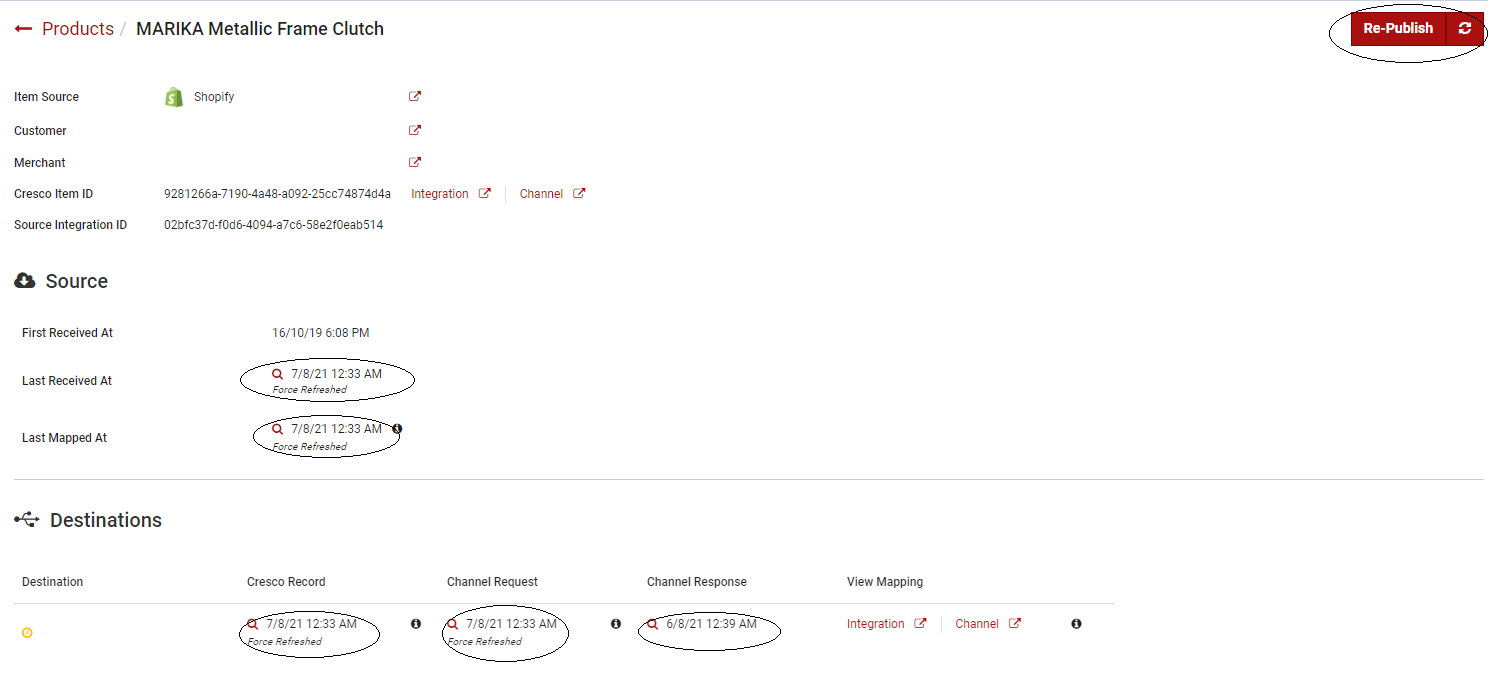
You may click on each of the products to check on the details of the product. The individual product page will contain details such as the RAW source data payload, the CML data payload, the data payload sent to the destination, and finally the API response from the destination for the product upload.
Individual product page
-
You may click into each of the Datetime values to view the corresponding data payload
-
Last Received At: The data payload from the source
-
Last Mapped At: The data payload after CrescoData has converted it to our CML format
-
Channel Request: The data payload sent to the destination
-
Channel Response: The API response from the destination
-
-
There is also a red “Re-Publish” button on each product page. This allows the user to re-publish the latest source data payload to the destination by applying the latest CrescoData mappings. Note: This is useful to re-publish products after you’ve made a mapping change on the portal such as Category mapping through our CrecoData Marketplace Mapper (CMM).
INTEGRATION DIAGNOSTICS PAGE
-
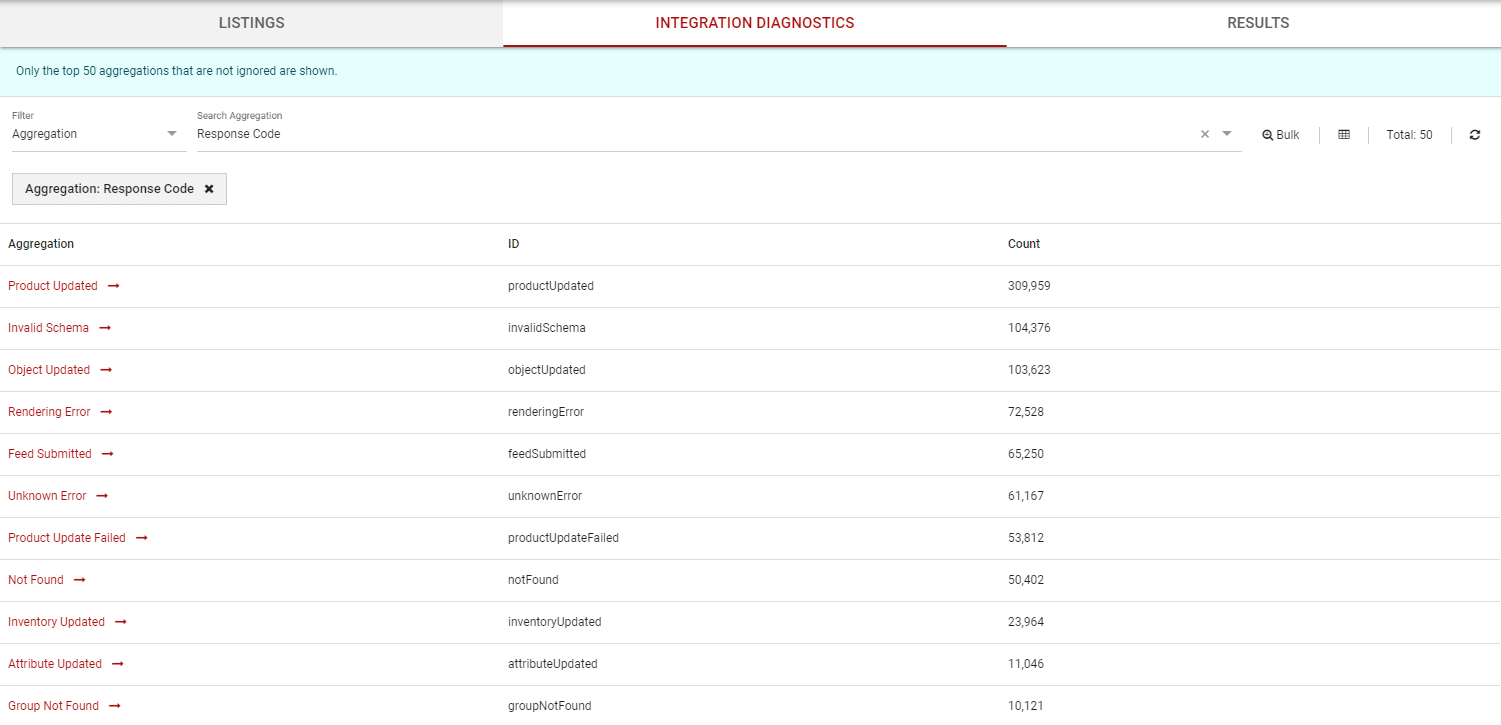
The Integration Diagnostics page shows the aggregated responses from the CrescoData portal.
-
This is the most effective tool to use to check for any errors with your integrations
-
Any negative responses should be looked into by clicking on the responses themselves. This will bring you to our results page which will show you the response details and allows you to determine the next course of action to resolve any issues.
Merchants page
-
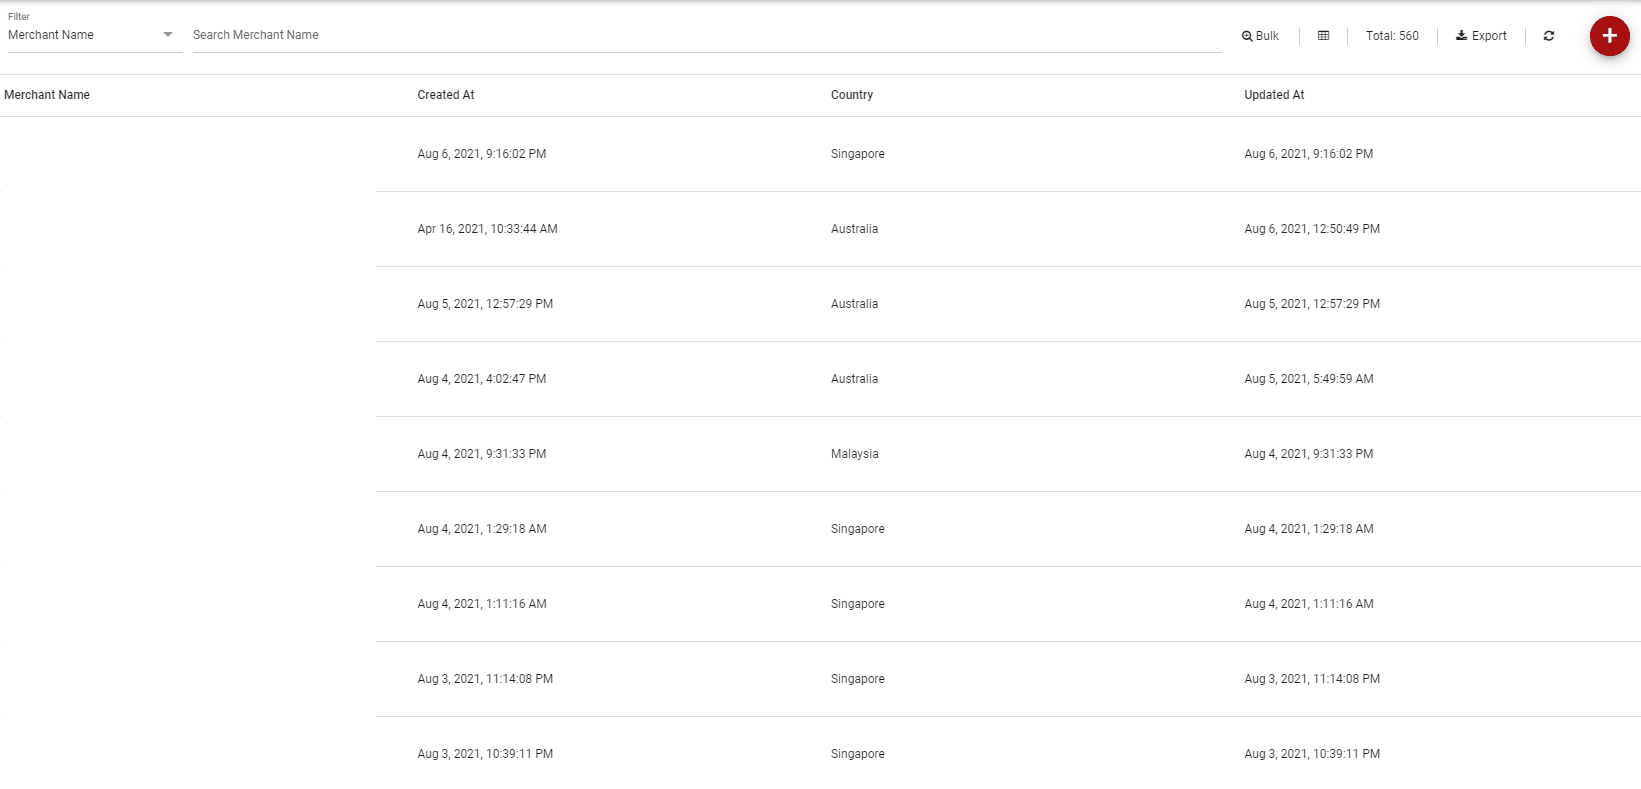
The merchants show you the list of merchants that your account has access to.
-
A merchant is a single integration between the source(s) and destination(s), that is usually owned by a single entity.
Tools
-
Filter
-
Most pages above have the Filter search bar near the top of the page
-
The filter field allows you to filter the results by the various attributes within the dropdown to narrow down your results. For example, you may filter your product listing results by filtering
Date Updatedor by searching for an individual SKU.
-
-
Re-publish
-
This button only exist on the individual product page
-
This allows the user to re-publish the latest source data payload to the destination by applying the latest CrescoData mappings
-
-
Force Refresh
-
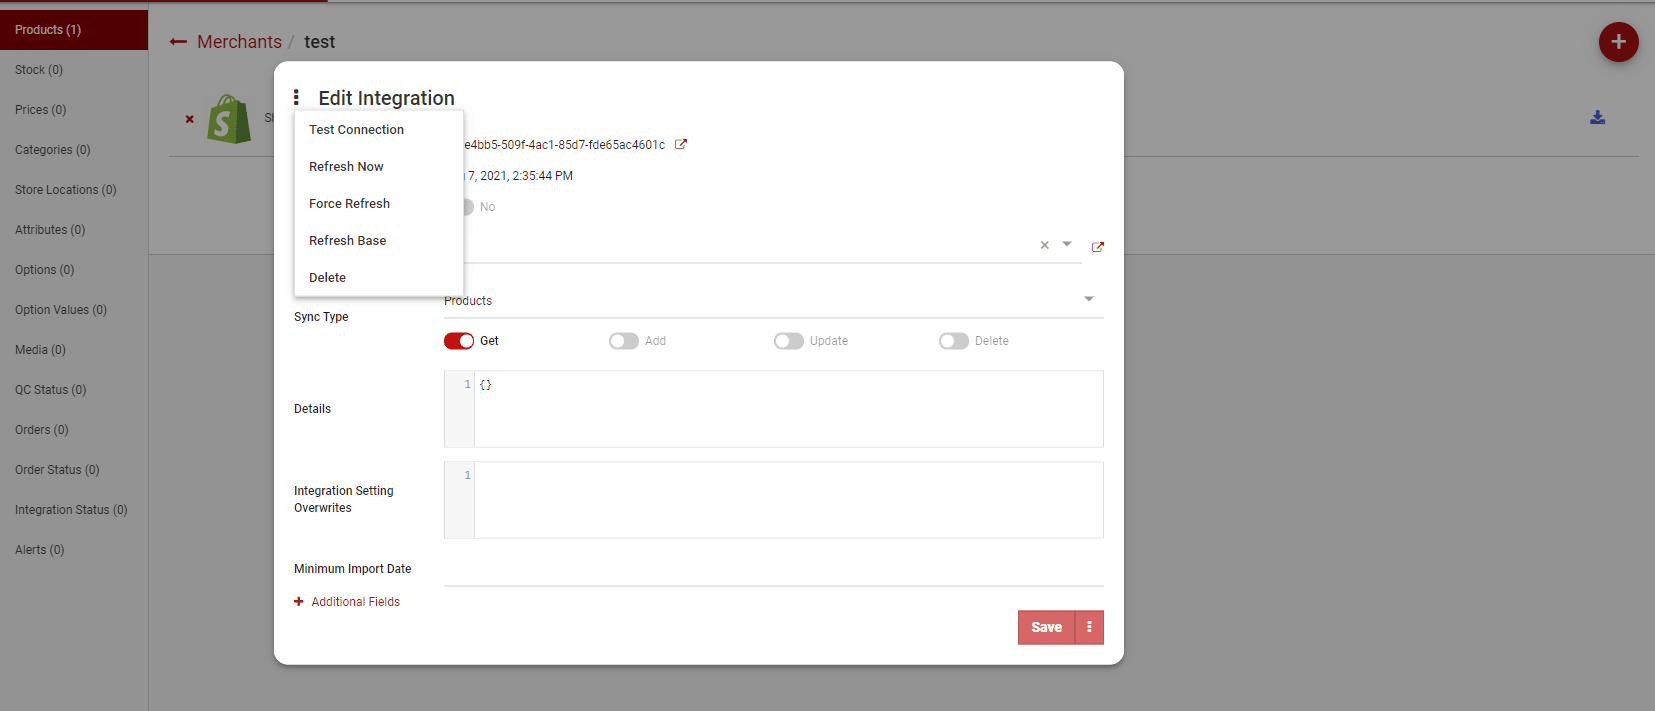
This button is available in the settings page of each service.
-
This should only be used to refresh all your products after you’ve made a mapping change in the CrescoData portal such as updating the Category mapping or the Product attributes through our CMM.
-
-
Export
-
Within the Product or Order pages, there is an
Exportbutton on the right-hand side. -
This button allows you to export the current list of filtered results as a CSV to be sent to your email with selectable fields
-
You may also use the export button to set up rolling notifications of errors.
-
To do this:
-
Head to the results page of either the Product or Order page (depending on which sync error you wish to set up for)
-
Filter by
Levelof Error -
Click on the Export button
-
Select “YES” for the
Scheduledbutton -
Set an export name
-
Select the fields you want to include in the CSV
-
Add the emails you want to send the notifications to. Note: Remember to press “Enter” after each email to confirm the email.
-
Select the schedule you wish the notifications to be sent
-
Select the
Rolling Fieldas “Updated At” -
Done. The system will now send scheduled notifications if it detects any new errors in the past scheduled time.
-
-
-
Using the Portal
Adding Merchants
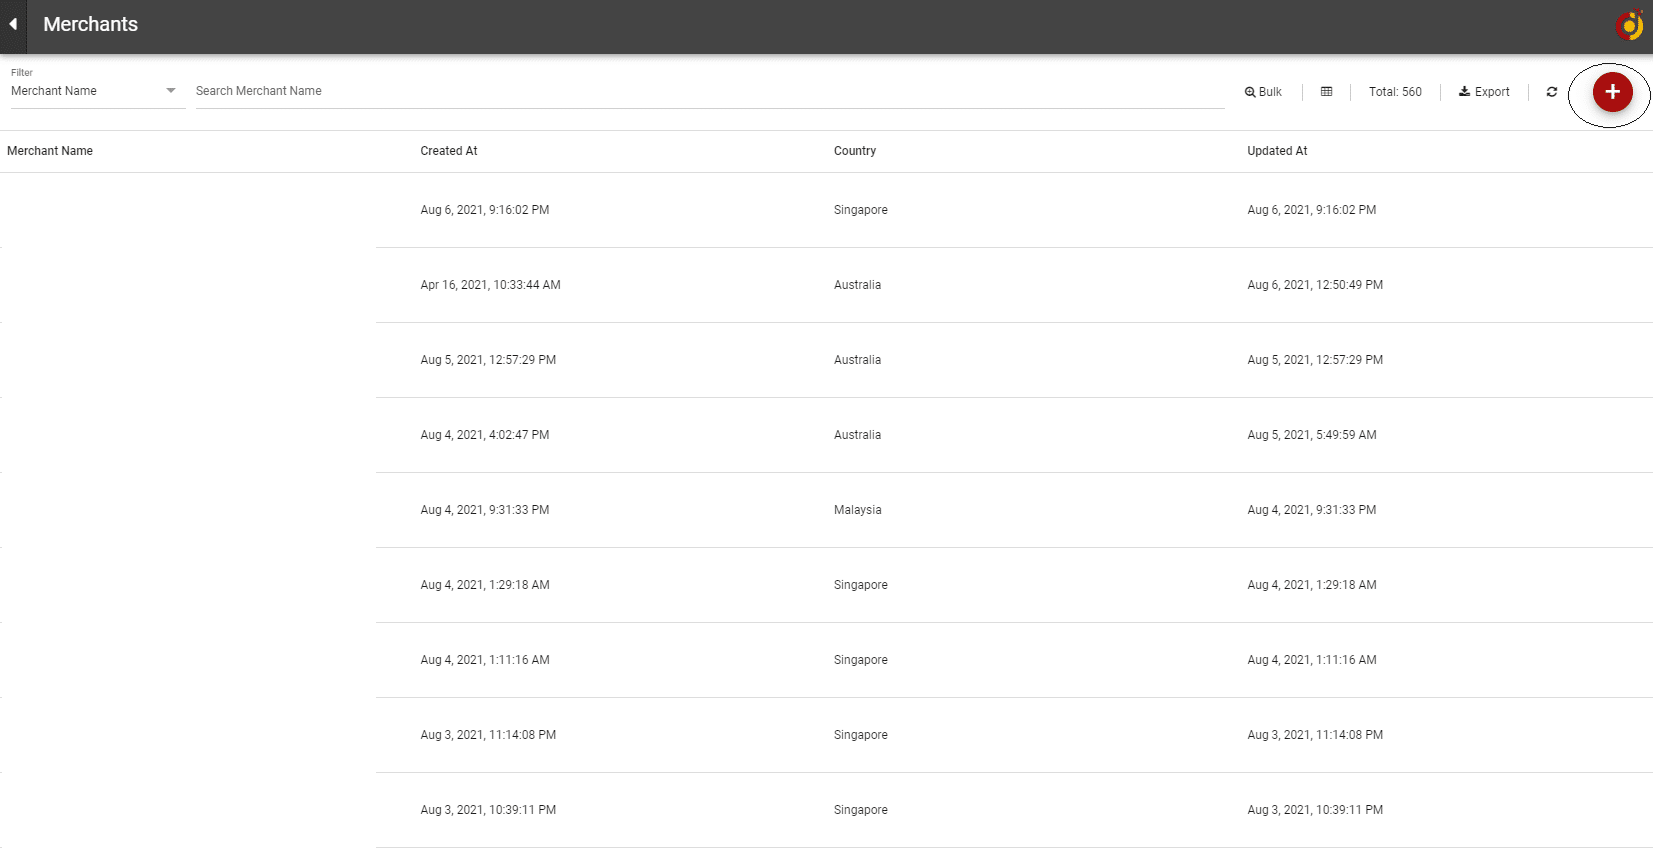
Head to the Merchants page
-
Click on the red
+button at the top right corner

-
Fill in the Merchant name within the “Company Name” field
-
Select the appropriate country in the “Country” field
-
Select the customer field
-
Click on Next
-
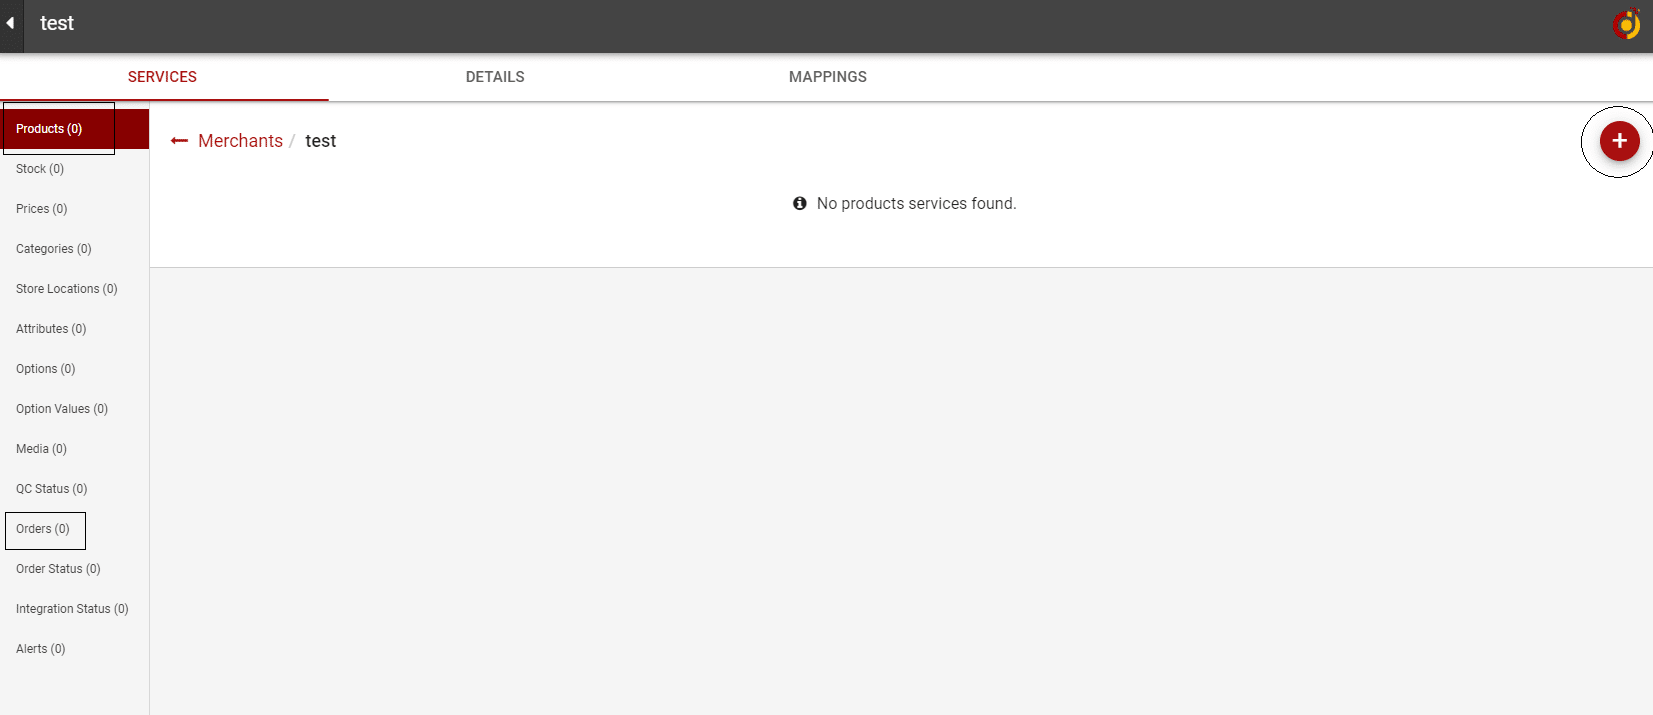
Done. And the portal will automatically bring you to the merchant page below where you will be able to add the required services.
Adding services
A service is a connection between CrescoData and the desired Marketplace/Platform. A service can either be a source (where CrescoData is pulling the raw data from) or a destination (where CrescoData publishes the final mapping to) or both a source & destination (where CrescoData will both pull and publish data to it. This will usually be limited to the Order sync.
-
Select the sync that you would like to add the integration from the left-hand panel
-
Click on the red “+” button on the top right corner of the page
-
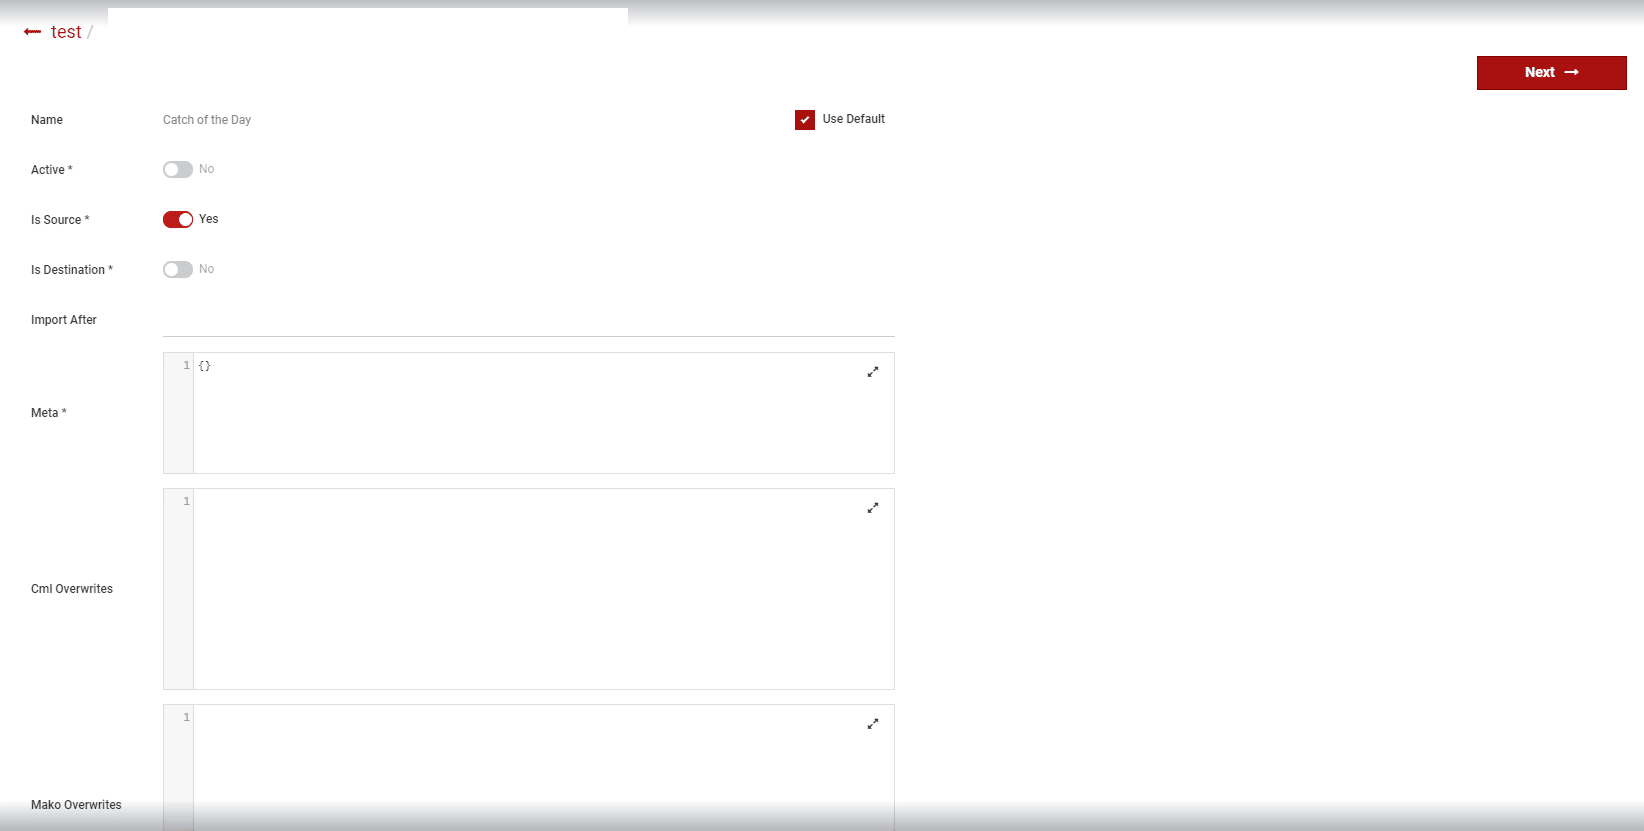
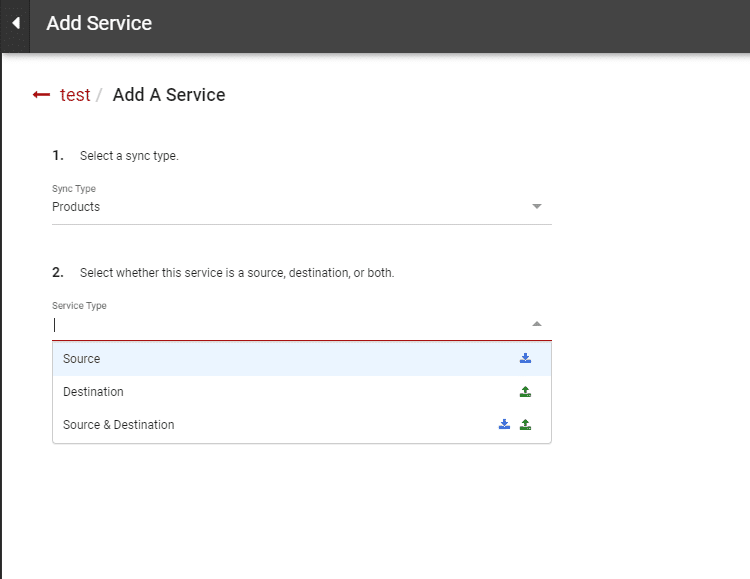
Select the Service Type first. It can either be the Source, Destination or Source & Destination. This is set during the initial onboarding project. Please review your onboarding project documentation or reach out to support@crescodata.com if you have any questions on this.

-
Select the appropriate system that you would like to add as the Source, Destination or Source & Destination.
-
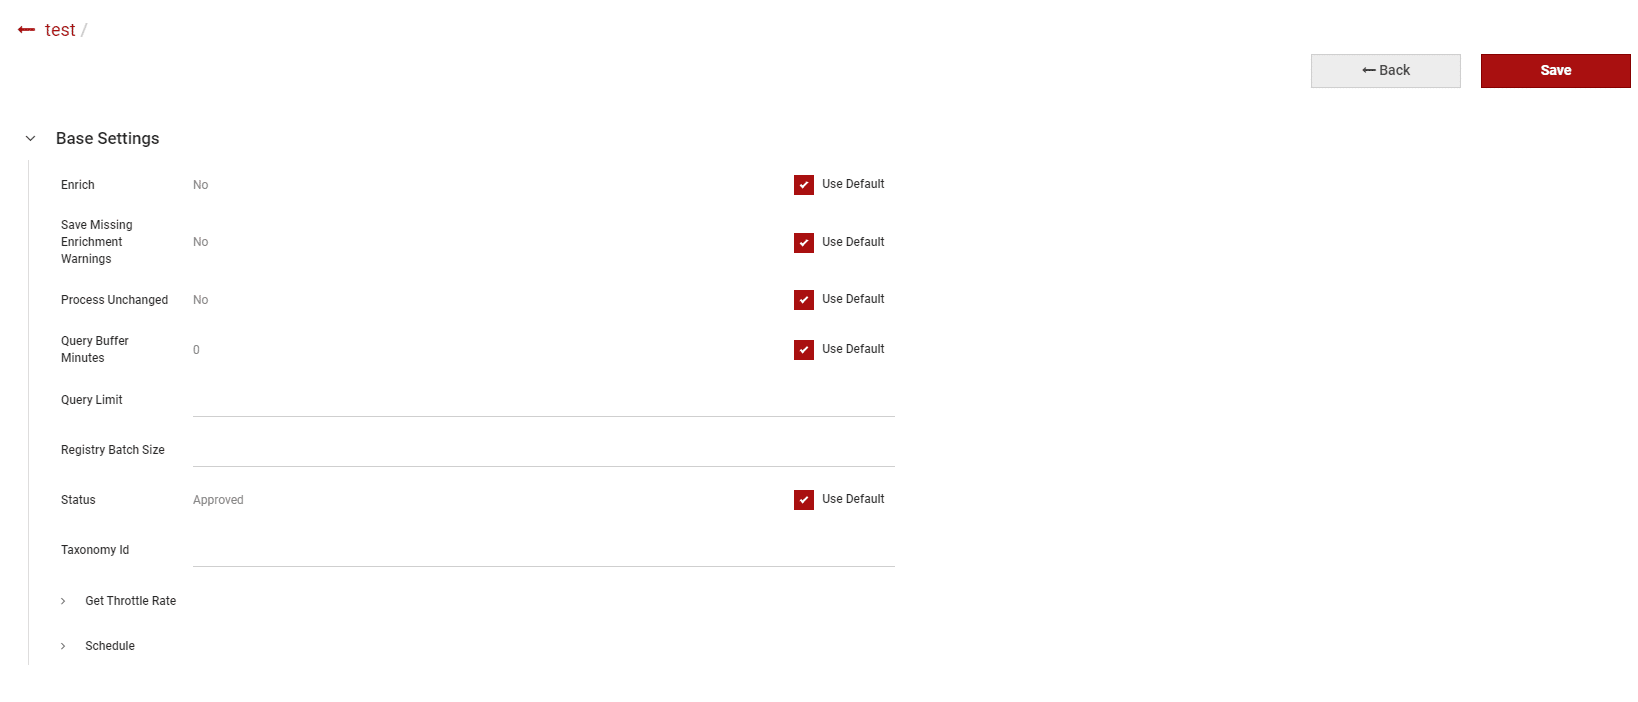
Skip through the next page. The settings on this page would have already been set during the onboarding project.
-
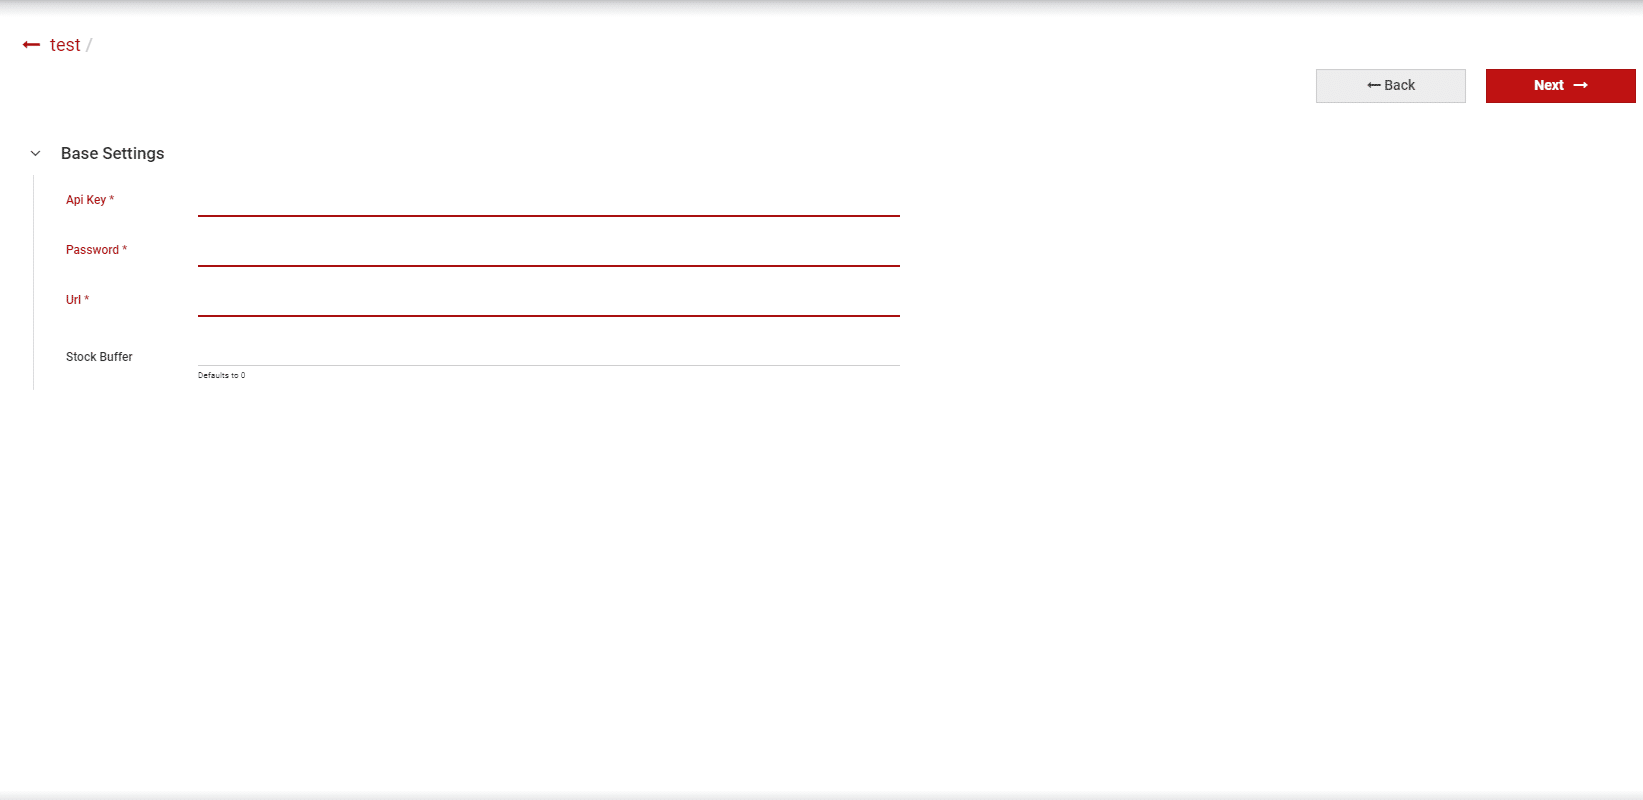
Fill in the necessary credentials when prompted by the system for each of the systems that you would like to integrate into.
-
Click on the “Next” button
-
Continue till you see a page with a “Save” button
-
Click on the “Save” button
-
Done

-
You will now see the added service within the sync that you have added
-
You will be able to tell if this service is a Source, Destination or Source & Destination by the icon on the right.
-
A blue down arrow means it is a source
-
A green up arrow means it is a destination
-
Both the blue down arrow and a green up arrow means it is a Source & Destination
-
-
To turn on the sync, click on the service itself, such as the Shopify icon in the screenshot above
-
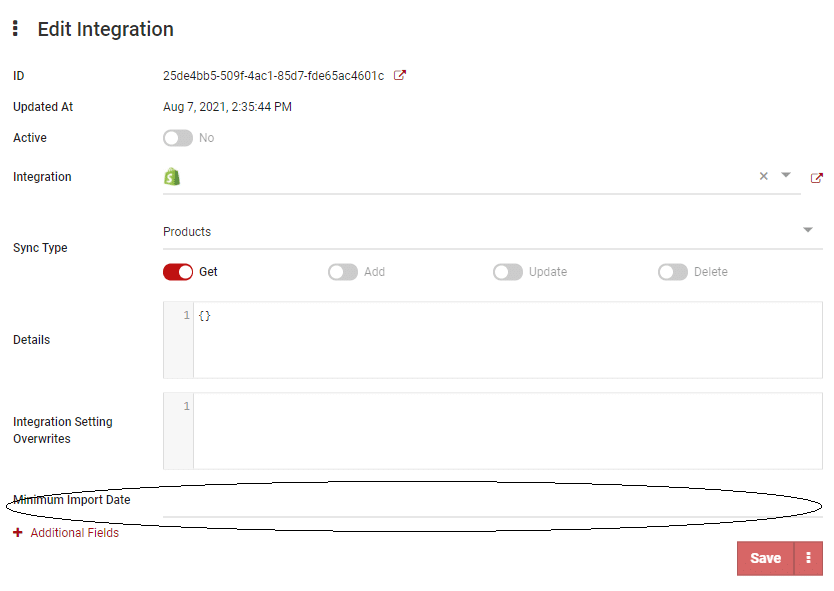
When first turning on a service that is a source. You must fill in the “Minimum Import Date” field. This field determines the earliest date that a created Product or Order CrescoData will pull from the source. For E.g. CrescoData will only pull products or Orders that are created in the source after the “Minimum Import Date”.
-
Once done, click on the “Save” button.
-
Note: The “Save” button will not be clickable if all the mandatory credential fields for the syncs are not filled in yet.
-
-
This is it. Repeat the above steps for the remaining syncs that you will need to create for each merchant.
Product mapping (CrescoData Marketplace Mapper)
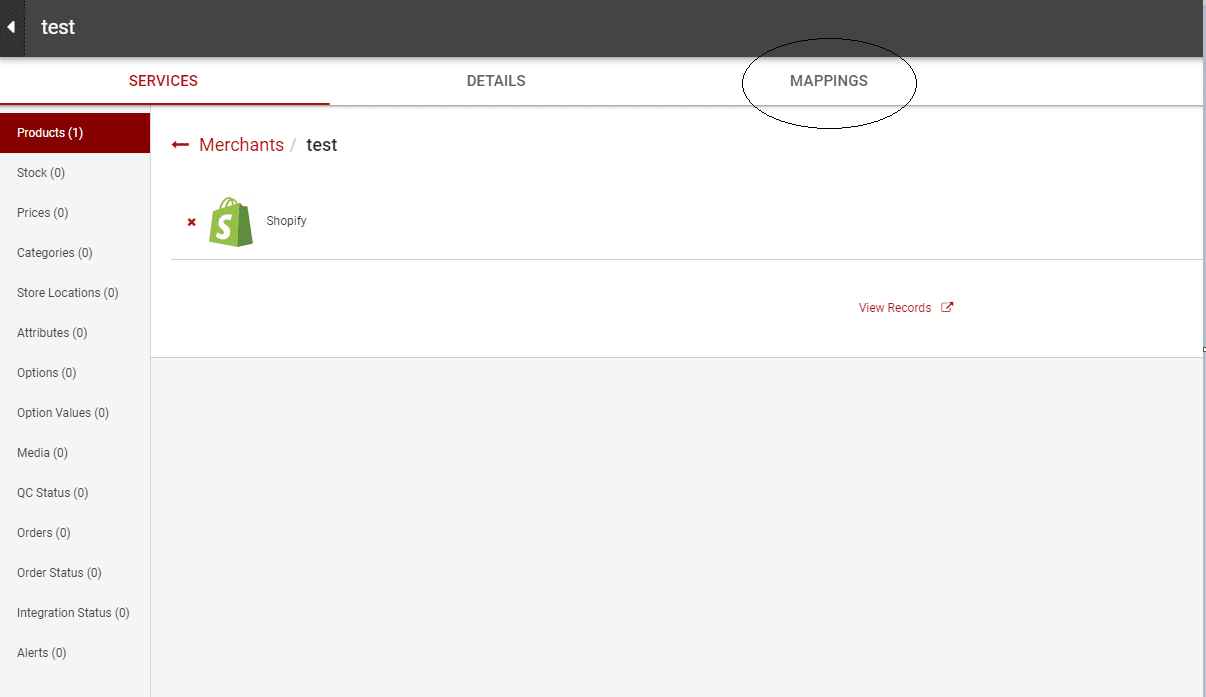
The CrescoData Marketplace Mapper (CMM) can be accessed through each merchant’s page by clicking on the “Mappings” label in the top panel within a Merchant page.
Category Mapping
-
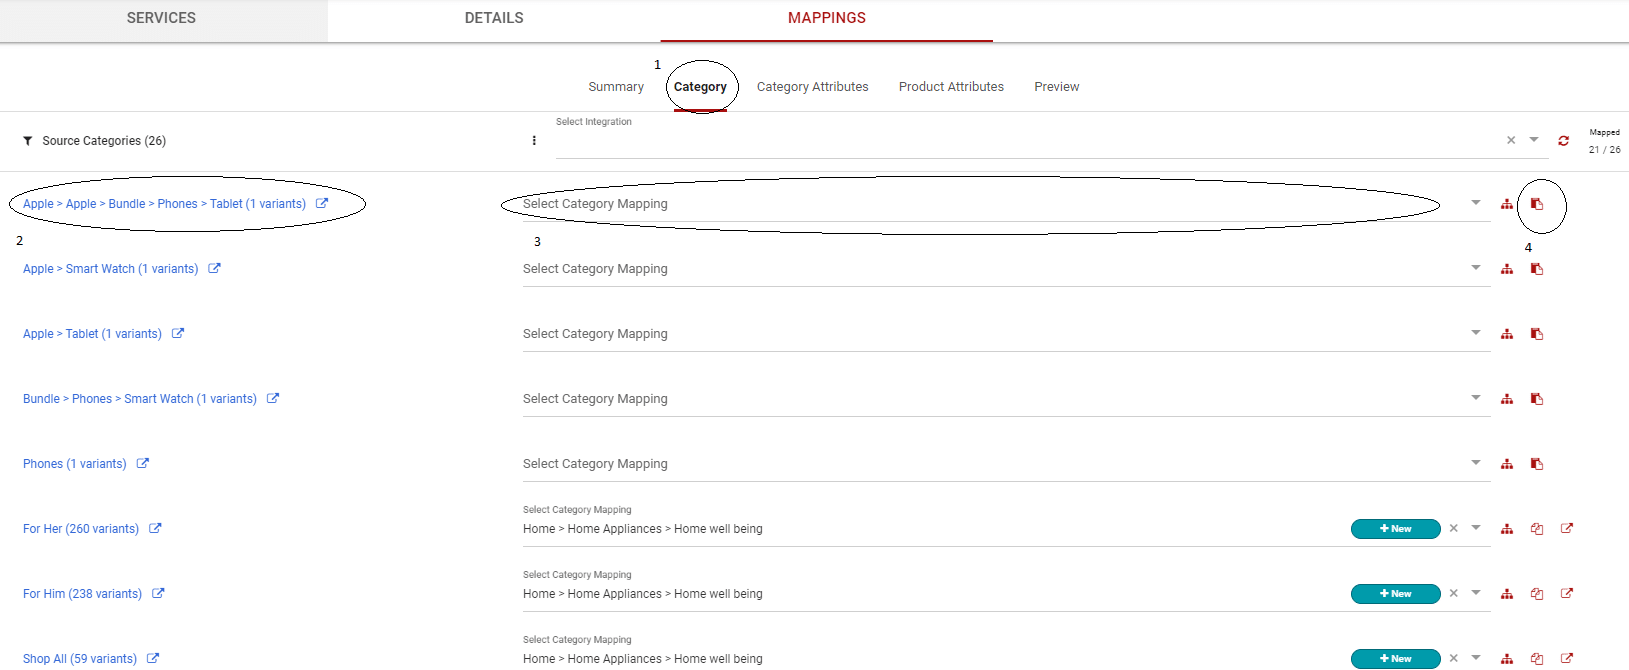
Click on the “Category” label to access the Category mapping page
-
This shows the category of the product in the source data.
-
Select the destination category to map the source data to
-
Button to allow you to copy the latest destination category value and paste it for other source category values
Category Attributes Mapping

-
Required if the destination has category-specific attributes
-
Example:
-
The destination marketplace/platform may have specific attributes for products within the “Bed” category such as “Bed size”, and this page allows you to map a source attribute to this attribute only for “Bed” category products.
-
Product Attributes

-
This is usually unnecessary, but possible if you have core attributes that are stored as custom attributes within the source data, or if the destination requires a specific list of values for an attribute that is different from your source values.
-
It allows you to make manual mappings for additional product attributes
-
You may select the destination attributes you want to map to manually on the left, and you may then select the source attribute on the right to map it to.
-
Upon doing that, CrescoData will pull out the list of source values for the source attribute
-
Then click on the red “Map” button to map the source attribute to the destination attribute
-
You may choose to click on the “Forward Unmapped” button to forward the raw source values to the destination.
-
However, if the destination attribute has a drop-down list of values, it is recommended to select from the Drop-down list, or there is a risk that it may cause an error in the product upload.
Troubleshooting
Here are the steps you may follow to troubleshoot any errors:
-
Products
-
Check the product page to make sure that CrescoData has successfully pulled the source product data
-
Check the destination marketplace/platform that the products have been successfully synced from the source.
-
If the products have not been uploaded successfully, check the integration sync page to determine if any errors have been raised
-
If there are, look through the response messages to see if they are indications of any common errors such as:
-
Lack of category mapping
-
If this is the case, simply map up the product category in our CMM and click on the “Force Refresh” button within the product sync service settings.
-
-
Server failure on the destination
-
This should be resolved by the next product update, else, reach out to CrescoData’s customer service desk for further assistance.
-
-
-
If there are unknown errors that you’re unable to resolve on your own, then reach out to CrescoData’s customer service desk by emailing support@crescodata.com for further assistance.
-
-
Orders
-
Set up an export to automate error notification to you OR manually check in on your orders from time to time, especially in the early stages of the activation to ensure that there are no errors.
-
If there are any noticeable errors, check the integration sync page to determine if any errors have been raised by CrescoData
-
If there are, look through the response messages to see if they are indications of any common errors.
-
If there are unknown errors that you’re unable to resolve on your own, then reach out to CrescoData’s customer service desk by emailing support@crescodata.com for further assistance.
-

